Vision is LearnSpeed’s integrated video conference and whiteboarding system. It works within most modern browsers without installing additional software. If you’re having problems using Vision on your computer, check these possible issues and suggestions.
Browsers
Use Google Chrome on a PC or Mac
LearnSpeed recommends using Google Chrome to run Vision. Vision will work in other modern browsers, but we have seen the least number of issues when using Chrome.
https://www.google.com/chrome/
Use Safari on Apple mobile devices
Vision only works in Safari on IOS devices.
Use Chrome on Android mobile devices
Use the latest browser version
Make sure your Google Chrome, or any other browser you may be running, is updated to the latest version.
Troubleshooting
Restart Vision tab
Many issues can be resolved just by reloading the Vision browser tab. Reloading your web page will rejoin an ongoing Vision meeting in just a few seconds.
Microphone and camera permissions
The first time you join a Vision session you will be asked by your browser if you wish to allow use of your microphone and camera for LearnSpeed.com. You will see a popup that asks you to allow access. Press “Allow”.
If you have denied your computer’s camera or microphone to your browser, you will see a little red cross through one of those icon’s in the browser’s address bar. Click on that to Allow Access to LearnSpeed.com.
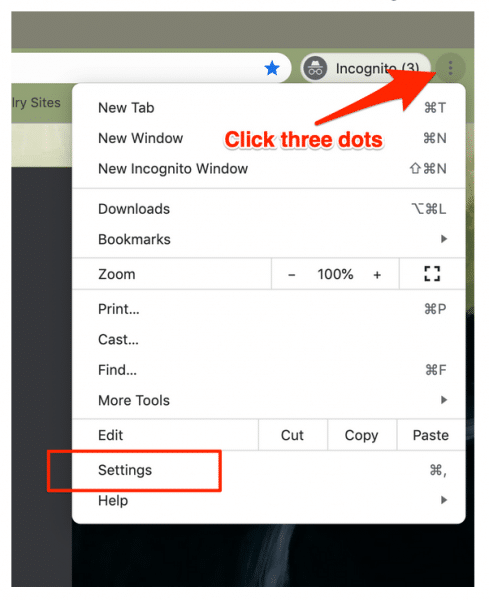
You may also manually grant access to the camera and microphone in your browser. In Chrome, for example, click on the three vertical dots in the upper right corner, to the right of the Chrome URL bar. Go to Settings.
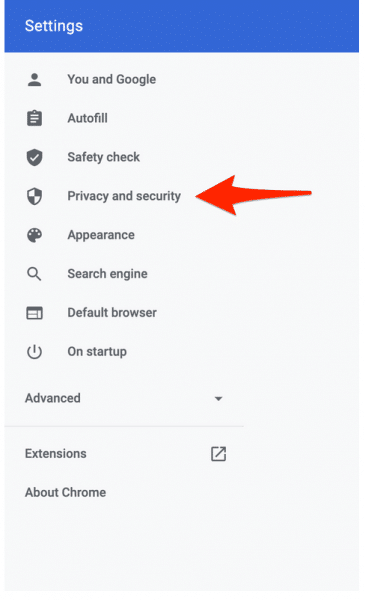
Then Privacy and Security.
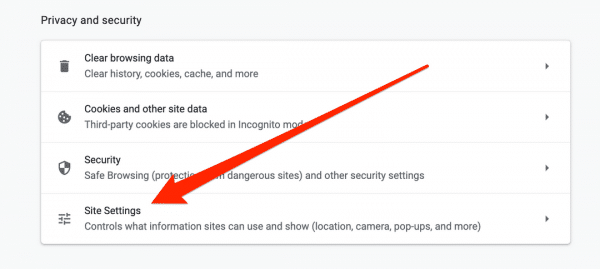
Then Site Settings
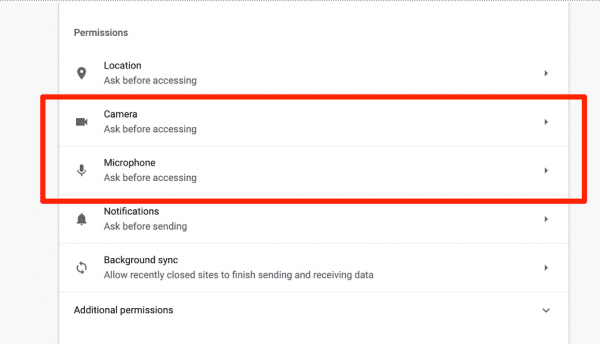
Scroll down to Camera and Microphone
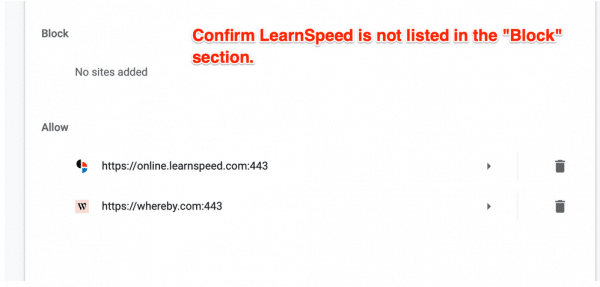
Click on each to see if LearnSpeed is blocked
If LearnSpeed is listed in the Block section, click on the small trash can icon to remove LearnSpeed from the blocked section. The next time your attempt to join a Vision session, you will be prompted to Allow Access. Click ‘yes’.
Audio
If you are having problems wth your speakers or microphone and you’ve checked your permissions in the section above, try reconnecting.
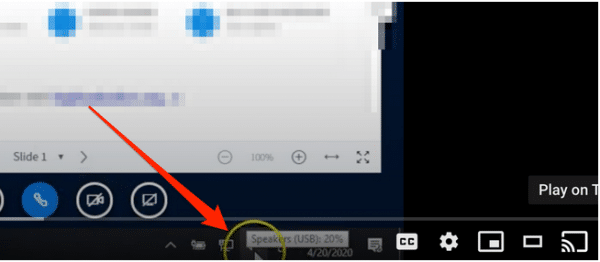
To reconnect, click on the icon at the bottom of the Vision page. Click on the crossed-out icon again to rejoin. This will start the echo test.
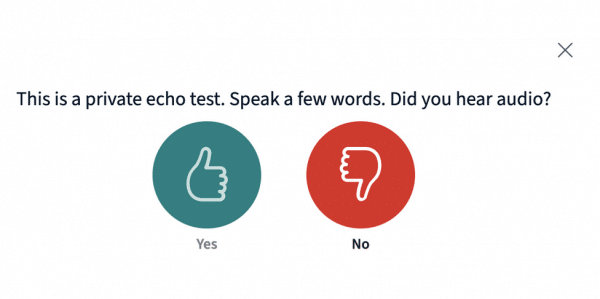
After the Echo Test: If you don’t hear your voice echo back, then click on the “No” Thumbs Down icon.
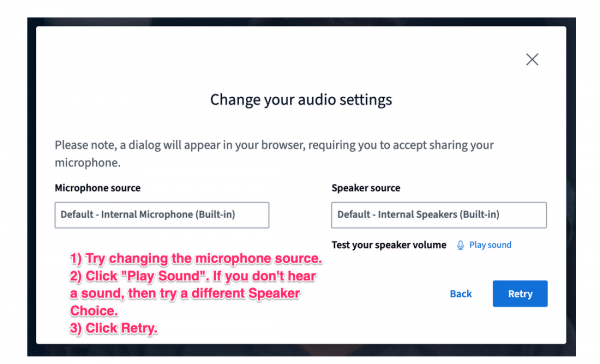
A dialogue below should appear.
Try clicking on “Play sound” to make sure the speakers are working.
If your issue is recording your own audio and you have alternate microphone sources available to your computer, select one of those and click retry.
If your issue is hearing the audio and you have alternate speaker sources available to your computer, selecte one of those and click retry.
Aways make sure the volume is turned up on whatever headphone or speaker setup you are using.
Windows microphone issues
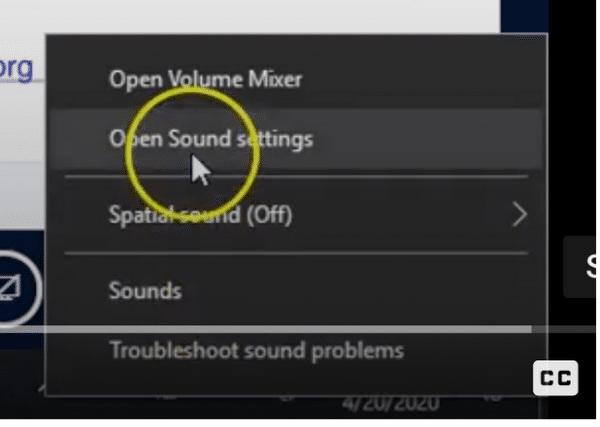
Go to Sound Settings
Open Sound Settings
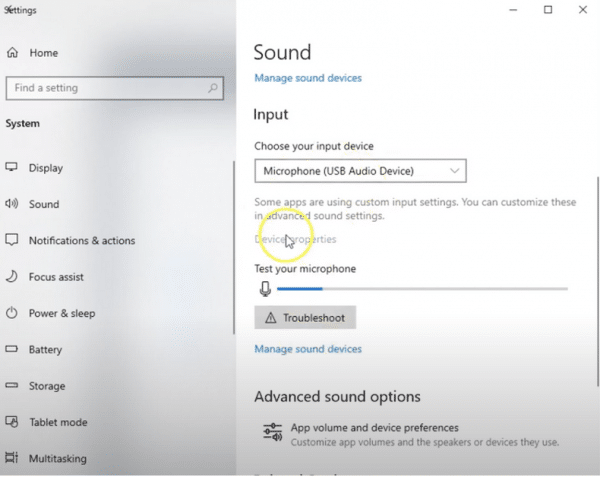
Click on Device Properties
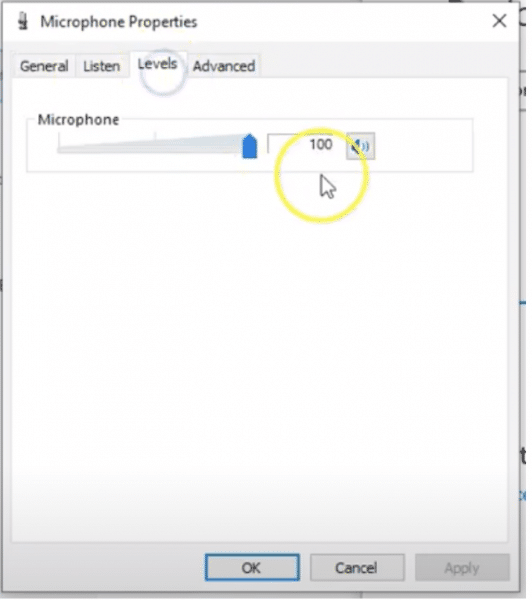
Make sure levels are turned on
Check your internet connection
Make sure you have sufficient internet bandwidth in your connection to support video conferencing. Download speed should be greater than 5Mbps and upload speed should exceed 1Mbps.
You can check your internection connection using theses websites.
Shutdown competing programs
Sometimes other programs you have running may be holding ownership of the microphone or camera. Make sure that no other programs which use your microphone or camera are open.
Close Zoom, Facetime, Skype, etc. If a competing program was open, close it, then reload the Vision Chrome page and try rejoining.
Restart your computer
Issues can be caused if a computer has been running for a long time without fully rebooting. Try rebooting your PC or Mac especially if using a laptop that is often in ‘sleep’ mode.
Update your Chromebook
If you are using Vision on a Chromebook, make sure your Chromebook’s operating system is running the most current release.
Screensharing
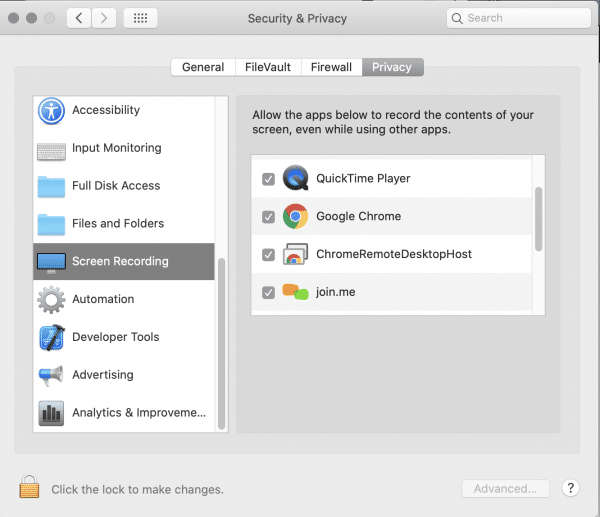
In order for Vision to share your computer screen, it must be given permission for ‘screen recording’. The first time your browser wishes to share your screen it should ask for this permission. If you have declined that permission in the past, you may have to re-enable it from the operating system level.
On a Mac, this is done though the System Preferences -> Security & Privacy pane. Click on ‘Screen Recording’. Then check ‘Google Chrome’ to allow it access to the desktop. You may have to click on the lock icon and authorize your administrative ability to make changes to these settings first.

